Prerequisites
- Company created under
Accounting > Company - Default currency set in
Accounting > Settings
1.0 Open the Chart of Accounts
- From the home page, click
Accounting > Chart of Accounts. - You’ll see a tree view of existing account groups and ledgers.
1.1 Create an Account Group
- Click the + New button at the top right.
- In the Account Type dropdown, choose Account Group.
- Fill in:
- Company: select your entity (e.g., Charisma Industrial)
- Group Name: e.g., “
Assets > Current Assets > Inventory” - Parent Account: pick the higher-level group (e.g., “Current Assets”)
- Is Group: ✔️ (so you can nest sub-groups or ledgers)
- Click Save.
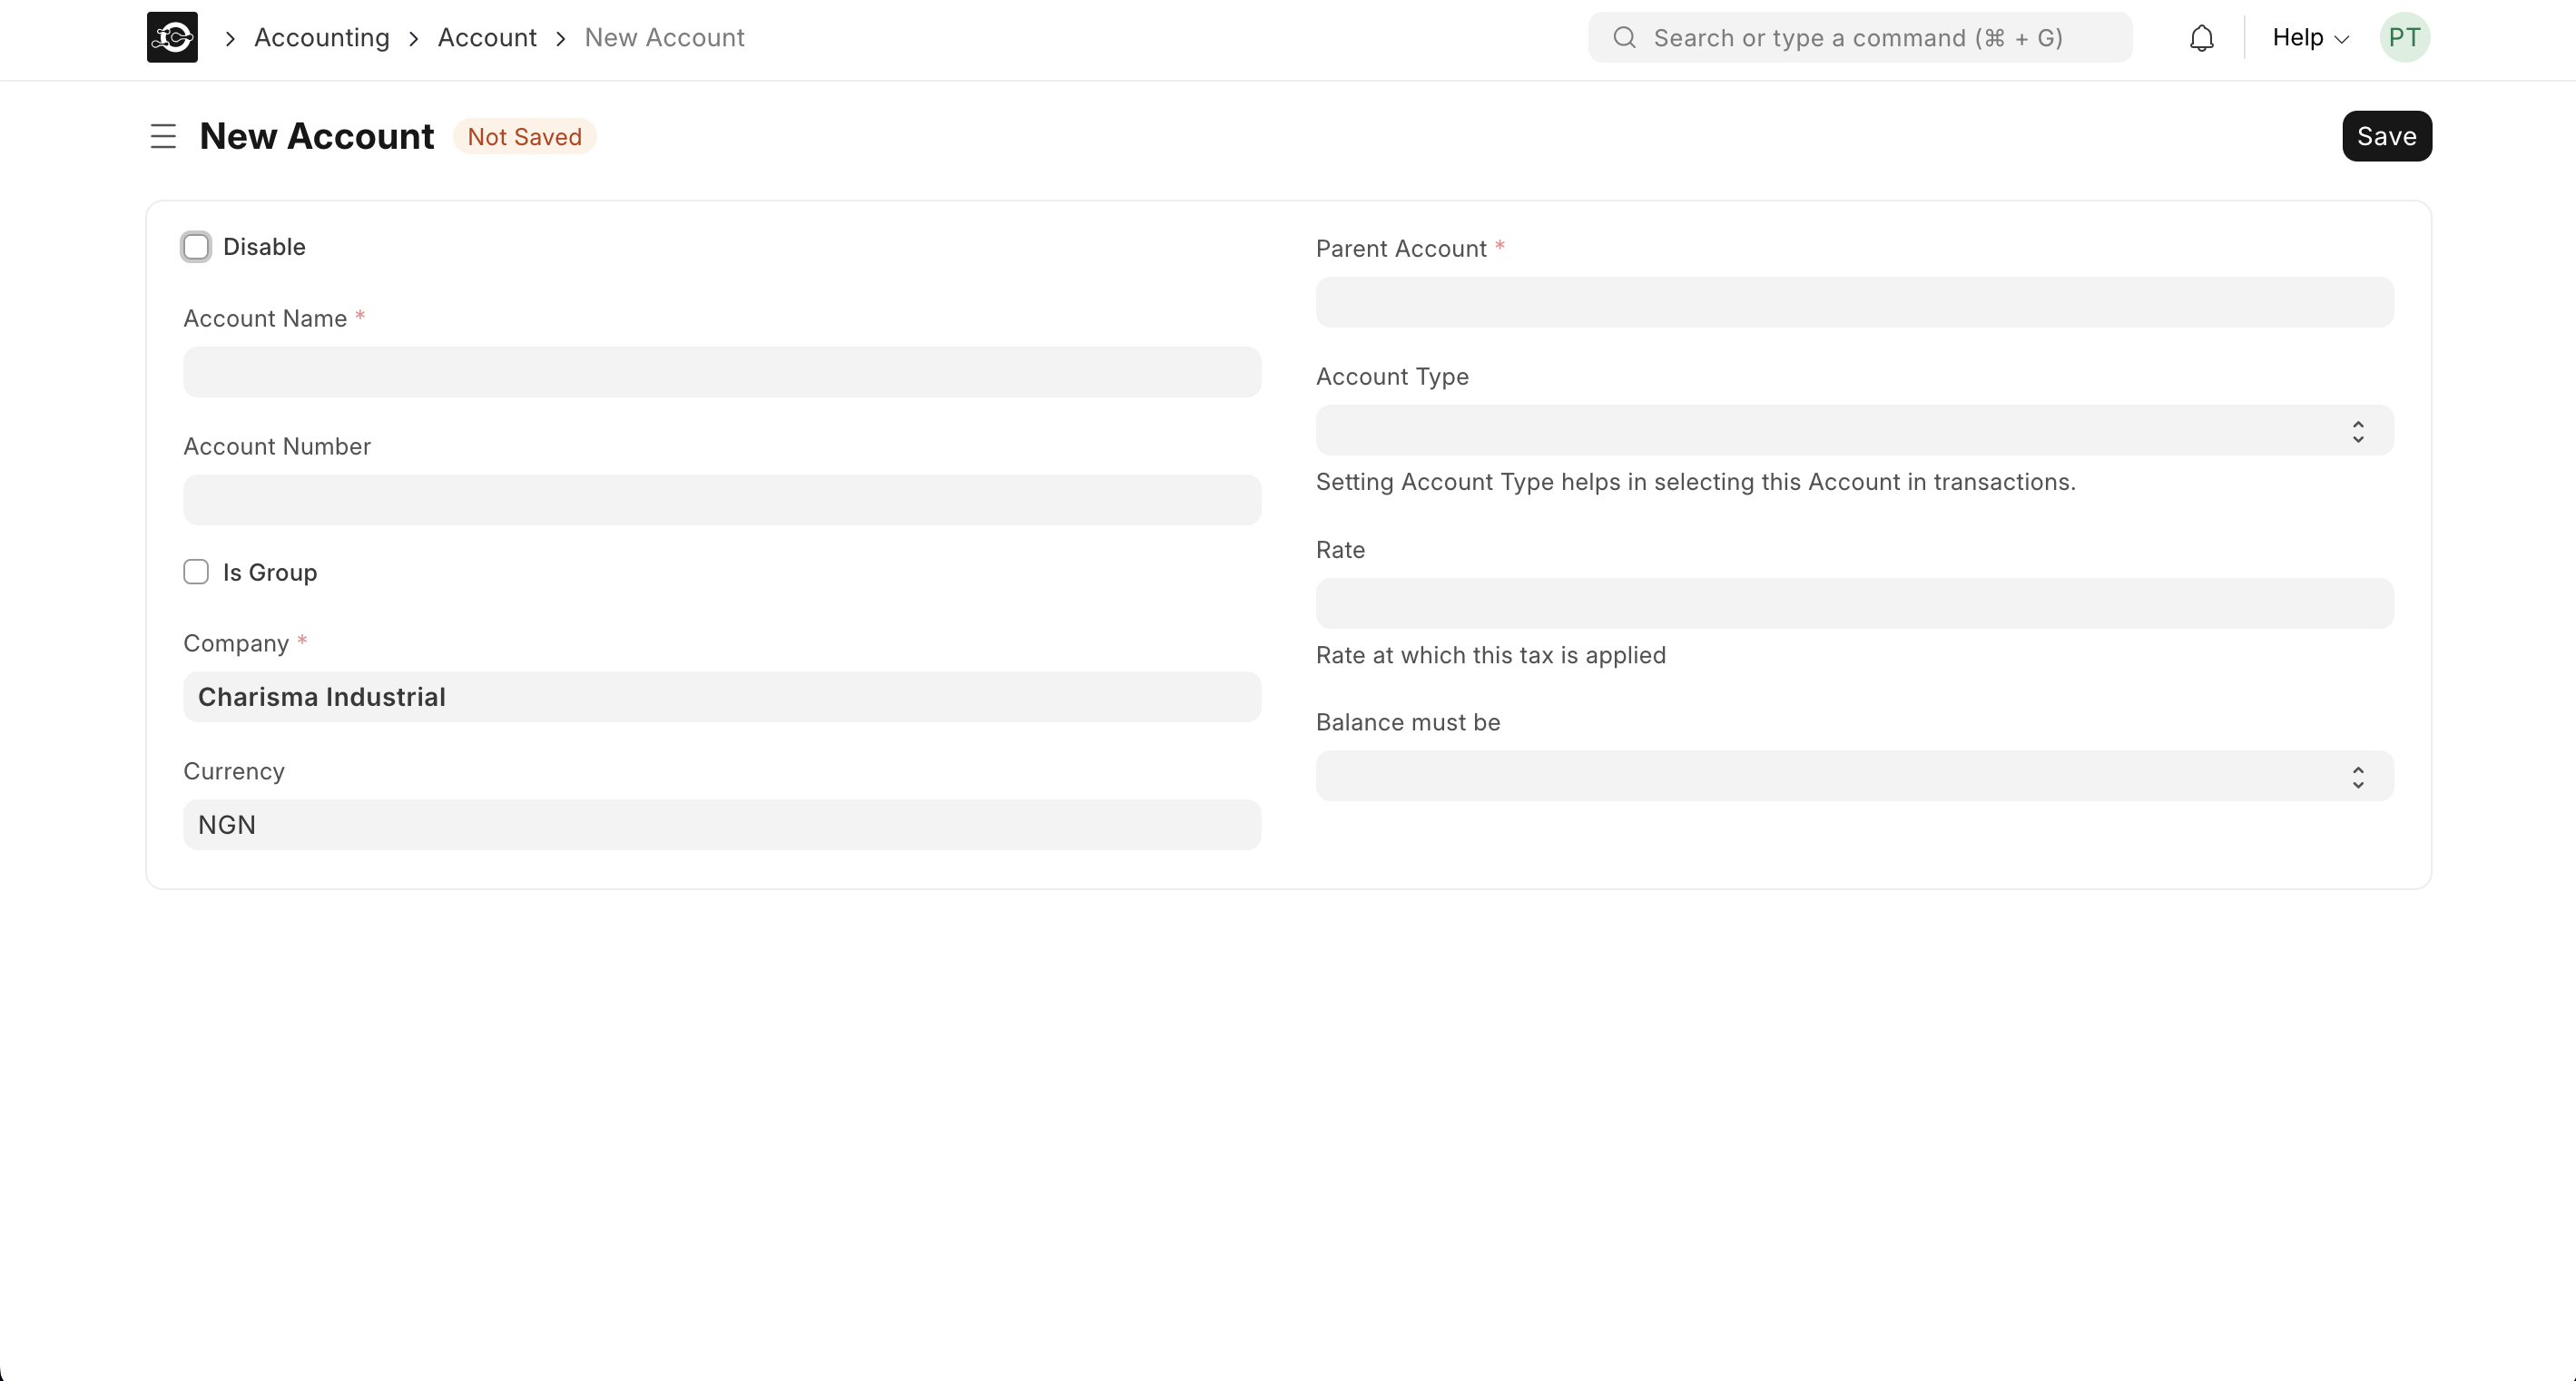
2.0 Create a Ledger Account
- Back in the Chart of Accounts list, click + New again.
- Select Account for Account Type.
- Fill in:
- Company
- Account Name: e.g., “COGS – Raw Materials”
- Parent Account: choose the relevant group (e.g., “Cost of Goods Sold”)
- Account Number (optional): a unique code for sorting
- Account Currency (if multi-currency)
- Click Save.
Ledger accounts cannot have child accounts—ensure Is Group is unchecked.
3.0 Edit or Reassign an Account
- In the tree, click any account or group to open its form.
- Click Edit (or
Actions > Edit). - Modify fields like Account Name, Parent Account, or Account Number.
- Click Save.
4.0 Disable or Delete an Account
- Disable:
- Open the account form.
- Check Disabled and click Save—preserves historical data but prevents new postings.
- Delete:
- Only possible if the account has no child accounts and no posted transactions.
- Open the form, click
Actions > Delete, and confirm.